Period Properties renovations - Hidden issues & how to manage them
You’ve bought a beautiful period home, full of charm, history, and potential. But as you look around, reality sets in. The cracks in the walls, the damp patches, the wonky floors… where do you even begin? Renovating an Edwardian, Victorian or Georgian home can feel overwhelming, especially when every new discovery seems to add another layer of complexity.
This is where the expertise of an experienced architect can be of real value. Restoring a period home isn’t just about fixing problems. It’s about understanding the building’s story, respecting its heritage, and making it work for modern living. With an experienced architect’s guidance, you won’t have to navigate the maze of structural quirks, outdated materials, and hidden surprises alone. They will help you anticipate the challenges, solve problems before they become costly, and bring out the very best in your home.
In this article, we’ll walk you through the most common hidden issues in period properties, why they happen, what they mean for your renovation, and how by planning carefully you can pre-empt issues and manage your project calmly. With the right approach, your home will emerge from the process not just repaired, but truly transformed.
This article will be a ‘living’ article where we document the kinds of hidden issues we’ve uncovered in period homes, to help homeowners understand what to expect once the layers start to come off. We'll continue to update it with real-world examples from site highlighting the problems, risks, and how we’ve solved them.
Common hidden issues in a period home and how to solve them
1. Cracks in Stucco Facades
Victorian homes often feature stucco facades, designed to imitate stone while being cost-effective. Over time, these facades can develop cracks due to settlement, water ingress, or poor-quality repairs. In a Grade II listed Georgian property we worked on which had a stucco front, we discovered that what looked like small cracks on the outside of the stucco were actually related to extensive structural damage to the brick wall behind. This was remedied by remortering the whole brick wall and placing masonry stitching to stabilise the area. Then redoing the stucco plasterwork to the exterior sensitively so that the area looked completely restored

Stucco render plaster facade. Behind the facade is a brick structural skin wall. Cracks in the plaster can sometimes be caused by structural issues in the brick walls behind.
Key Risks:
Water penetration leading to damp and mould.
Compromised integrity of the external walls.
Expensive remedial work if not addressed early.
Solution:
Conduct a structural survey before work begins. Although even with surveys not everything will be picked up.
Repair cracks using breathable, lime-based materials rather than cement-based fillers, which can trap moisture.
Improve external drainage and apply a protective but breathable finish to prevent future damage.
Use helifix structural repairs if brickwork beneath is compromoised and has cracks.
2. Asbestos in unexpected places

Asbestos can be hiding in floors, ceilings and around pipework usually. These won’t be visible until these areas are opened up and disturbed during building works.
Asbestos, widely used in construction until the late 20th century, is frequently found in older homes. Beneath flooring, around pipes, and in insulation materials, its presence poses significant health and legal risks. Removing asbestos requires licensed specialists and careful project coordination.
Key Risks:
Health hazards from exposure.
Work stoppages and increased costs during remediation.
Solution:
Commission an asbestos survey before starting any work.
Engage licensed asbestos removal specialists to handle the material safely.
Ensure proper disposal and clearance certification before resuming construction.
If new asbestos is found after the project starts on site, ensure the site is cleared of workers until the asbestos has been removed by a qualified company who provide documentation of the safe removal and disposal.
3. Unstable Chimney Flues and Masonry

An unstable chimney flue we discovered in one of the Victorian properties we worked on. It had to be stabilised by drilling rods into the flue, then chemically fixing and finally filling it with concrete 6m high.
Victorian and Georgian homes often feature multiple chimneys, integral to their design. Over decades, weathering, insufficient maintenance, or removal of adjoining fireplaces can leave flues unstable. During one project, chimney instability required a complete rebuild to prevent collapse and restore structural integrity.
Key Risks:
Collapsing masonry posing safety risks.
High costs for unplanned stabilization or reconstruction.
Solution:
Carry out a structural assessment before renovation begins.
Reinforce or rebuild unstable chimney stacks while preserving original details. Here are the details of how this issue was addressed on one of our recent projects:
Clean all the loose rubbish and dispose of the damaged bricks and any debris that has accumulated in the chimney flue over time
Drill rods in 3 sides of the chimney flue and chemical fix in the wall.
Ply shutter the post side and concrete the flue around 6m high and remove the shuttering after drying
4. Bouncy Floors and Rotten Beams

A Grade II listed Georgian home where we discovered the central support under the joists had been severed leaving the whole area inadequately structurally supported. The solution was a new steel reinforced timber beam that was fixed into the masory walls on either side and bolted to the joists from underneath.
A common issue in period homes is the discovery of bouncy or uneven floors. This is often caused by timber beams rotting due to damp or becoming disconnected from adjoining walls. Or in other occasions due to key structural elements having been removed over time. In the instance of one project in a Georgian Grade II listed building, we discovered that a main structural beam that should have run under the centre of the floor joists had been cut off about a metre away from where it started when it was meant to run the full width of the room in order to properly support the floor joists. As a result the floor was bouncy, uneven and if we had left it over time eventually the walls would have started to collapse.
Key Risks:
Risk of floor collapse under load.
Risk of wall collapse over time
High costs for timber replacement and new structural elements
Solution:
Identify weak points with a structural survey.
Replace decayed timber with treated, conservation-grade materials.
Reinforce existing beams with steel supports if necessary.
5. Hazardous Lead-Based Paintwork
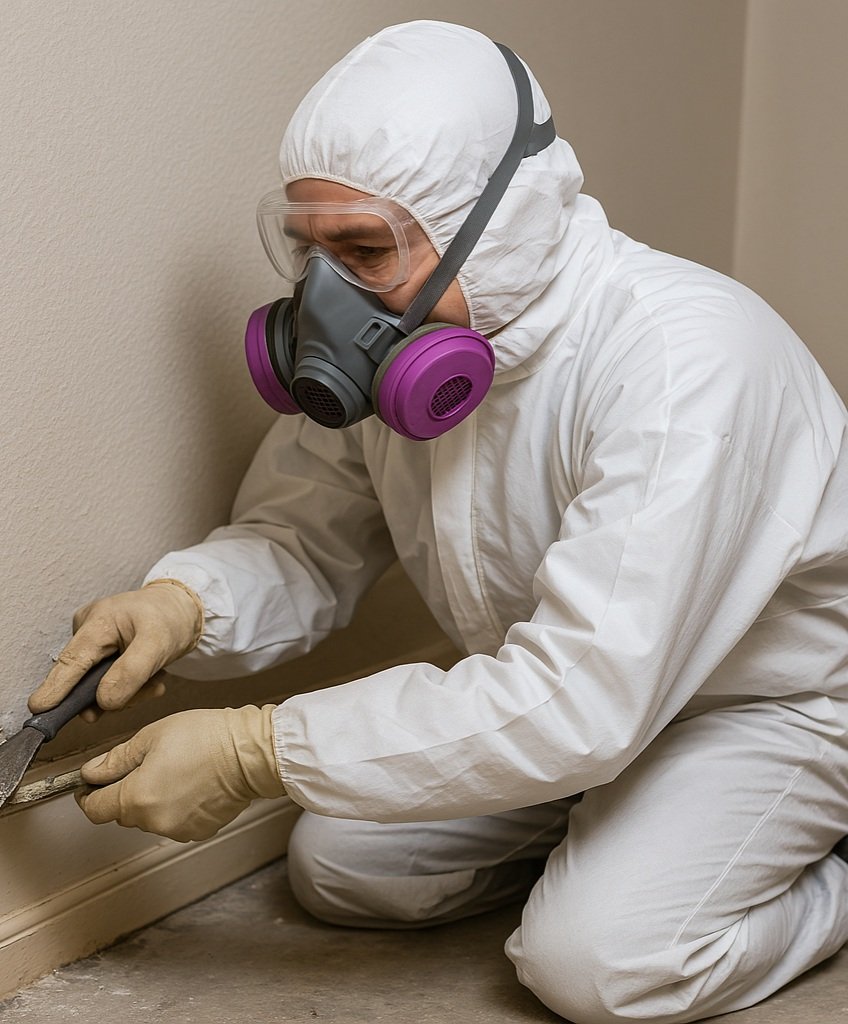
Workers must wear the appropriate PPE (Personal Protective Equipment) to ensure they are safely protected from the poisonous lead dust as it is being removed.
Lead paint, commonly used in pre-20th-century properties, poses significant health risks, particularly to children. Stripping and replacing these finishes requires careful planning to ensure safety during the process. Under COSHH (Control of Substances Hazardous to Health Regulations), the builder's employer is responsible for assessing and mitigating risks. In this instance this is the client but under the CDM regulations, the ‘Principal Designer’ takes on the role of ensuring that that regulations are followed and the workers are not put at risk but flagging up these issues in a risk register before the project begins.
Key Risks:
Health hazards from lead dust.
Delays during hazardous material removal.
Solution:
Conduct lead paint testing before stripping any surfaces.
Use controlled, specialist removal methods to avoid releasing toxic dust.
Repaint using eco-friendly, breathable paints suitable for period homes.
6. The Impact of Wartime Alterations

Post WW2, any materials available were used to rebuild people’s homes, this resulted in unusual materials like terracotta and even rubble being used to fill partition walls of Victorian homes that had suffered bomb damage.
Properties in areas affected by wartime bombing often feature unrecorded repairs or modifications. These alterations can complicate renovation plans if not properly understood. On one of our projects in a Grade II listed Victorian home in South Kensington on Queen’s Gate Terrace we discovered a strange metal column buried in a wall where there would ordinarily not have been a column required. This meant that we had to rearrange our design layout as we had originally thought we could locate a new bathroom in this area and as a consequence of the column we had to relocate the pipework elsewhere and move the location of the toilet. The unexpected column had been placed there to restore structural stability following a bomb blast in WW2. In the same property we discovered that many of the partition walls had terracotta bricks inside them as well as some rubble. We learned that following the war when people were trying to repair and restore their homes and building materials were scarce, lots of unusual materials were used as time was of the essence and there was not ample resources available.
Key Risks:
Hidden instability or non-compliance with modern building regulations.
Delays caused by unexpected structural work.
Solution:
Research the building’s history to anticipate potential wartime alterations.
Conduct in-depth structural surveys, including ground-penetrating radar if needed.
Reinforce or replace compromised elements while maintaining period accuracy.
7. Hidden Rivers and Damp Risks

Map showing London’s original geographical layout with rivers that have since been hidden or submerged. These hidden rivers can often cause issues for houses in London - "London Before the Houses", map of pre-urban London from 1884.[1]

Some Georgian and Victorian homes were built over or near natural watercourses. These hidden rivers can cause unexpected damp or subsidence issues. In one of our projects in West London, we discovered a tributary to the river fleet running under our clients house that was causing damp to spread up the bricks, and rot the beams above. At one point when we took up all of the floor the whole area looked like a swimming pool. The solution was to strengthen the two flank walls of the terraced house with additional foundations and to create a drainage route to allow the river to pass by the house without flowing onto the soil below the house and making it sodden at all times. A full tanking system was added along with two sump pumps that ran at all times.
Link to a fascinating website that documents London’s ‘lost’ rivers - ie those buried as London was modernised.
Key Risks:
Persistent damp leading to rot and mould.
Structural instability due to water flow and rotting of the buildings wooden structure.
Instability of the ground beneath the house.
Solution:
Conduct a site assessment to understand underground water risks.
Install drainage solutions such as sump pumps or French drains.
Tank the full basement / lower ground floor
Use breathable waterproofing solutions to prevent trapping moisture inside walls.
8. Inadequate Waterproofing in Lower Ground Floors and Basements
Period homes with lower ground floors or basements were built without modern waterproofing methods. Period properties in London were constructed at the lower ground floor level to consist of leaving a gap of approximately 50cm to 1m of space between the soil beneath and the timber joists above to allow for cross ventilation to keep the area dry. Vents were placed at both ends of the property that allowed for fresh air to be sucked through and out of the building creating a ventilation flow that allowed moisture to escape and keep the area dried and well ventilated.
In a number of the properties we have worked on in Victorian homes, we have discovered that the lower ground floor vents had been sealed up over time and so there was no ventilation left and the area had become sodden.
On another property we discovered that over time, other builders had thrown all of their debris and soil dug out from other parts of the build under the house so that there was no longer any gap between the joists, so again the joists had become rotten.
On another property again we discovered a very strange condition where the joists had been fully removed but no new structure had been added at all, we just discovered a thin layer of concrete screed less than 2cm thick and underneath it was just soil! So effectively the house had not bracing structure at basement level, making the house structurally unstable.
The best and longest term solution in all of these cases is to cast a new thick ground bearing slab and then waterproof and tank the area extensively adding sump pumps and new drains as necessary if there are high levels of water ingress in the area.
Key Risks:
Chronic damp leading to mould, rot, and air quality issues.
Structural damage from prolonged water ingress.
High costs for retrofitting waterproofing solutions.
Solution:
Do opening up works before the project starts to try to identify the make up of the floor on the lower ground / basement levels, so that a solution can be costed up before a builder is appointed, so that you get a competitive price from them before works start on site.
Cast a new concrete ground bearing slab to strengthen the house and prevent movement and prevent water ingress.
Install cavity drainage systems to direct moisture away from internal spaces.
Use internal tanking where necessary, ensuring breathability.
Improve external drainage and ventilation to reduce ground moisture levels.
9. Defective or Outdated Drainage Systems

Victorian and Georgian homes often have original clay or cast-iron drainage systems, which can deteriorate over time. On some of our projects we have discovered that in addition to the drains that we knew were in place due to visible manhole covers, we have discovered deeper Victorian drains often broken and no longer connecting back to the mains drains, so rainwater is being discharged into them but not draining out, effectively pouring water into the soil that the building is resting on.
Key Risks:
Risk of flooding due to outdated or blocked drainage.
Damage to foundations from leaks or poor surface water management.
Potential legal complications if drainage is shared with neighbours.
Solution:
Conduct a CCTV drain survey to identify weak points and blockages.
Replace faulty drains with modern equivalents, ensuring compliance with conservation guidelines.
Install new soakaways or drainage channels to manage excess water.
10. Inconsistent Ceiling Heights and Altered Floor Levels
Over the years, many period homes have been modified, sometimes resulting in mismatched floor levels or lowered ceilings.
Key Risks:
Awkward transitions between rooms affecting functionality.
Structural risks from poorly executed alterations.
Unexpected costs to correct floor and ceiling alignments.
Solution:
Assess historical modifications and determine the best approach to restore or improve layouts.
Reinstate original ceiling heights where possible for better proportions.
Use subtle level changes, such as steps or thresholds, to manage floor discrepancies.
11. Inadequte structural floor joists
In some of the period homes we’ve worked on, opening up the floor to install new insulation and floorboards has revealed that the structural joists have been compromised. Over time, these joists had often been altered or cut away, making them unsafe and no longer structurally sound.

Basement level looking up to joists that were not adequately supported
In one particular project, this issue stemmed from a partition wall at lower ground floor level that had been removed at some point in the building’s history. Historically, the wall would have supported the floor joists above, which spanned from the front to the back of the house. Once removed, a minimal and inadequate timber connection had been inserted in its place, leaving two sets of joists effectively floating.
The solution in that case was to insert an entirely new set of timber beams between the existing ones to restore structural integrity. Removing the original beams would have been too invasive and costly. Additional strengthening elements were also added to tie the old joists together securely. The structural engineer on our project led this whole process and produced structural calculations for building control to prove that the new solution was entirely safe.
Key Risks:
Structural instability due to cut or altered joists
Undetected issues leading to sagging or unsafe floors
Potential danger to occupants if left unresolved
Unexpected costs and delays during construction once floors are opened up
Solution:
Thorough structural inspection once floors are exposed
Insertion of new structural timber between existing beams where possible
Avoiding full beam removal to limit damage and cost
Adding appropriate strengthening elements to integrate and secure old joists
Involving a structural engineer early if there are signs of compromised floor integrity
If you have a period home that you are considering restoring, extending or refurbishing, we would love to help. Feel free to get in touch for an initial free consultation by clicking the button below.